Activité pratique
Duration1h15Présentation & objectifs
Le but de cette activité est de vous aider à découvrir comment fonctionne votre ordinateur, et quels sont les principaux éléments physiques qui le composent.
De plus, vous apprendrez à manipuler le terminal pour naviguer dans votre système de fichiers et exécuter des commandes.
Contenu de l’activité
Vous connaissez peut-être déjà l’intérieur de votre propre ordinateur, néanmoins vous ne savez peut-être pas comment obtenir ces informations depuis une Interface en ligne de commande (CLI). Dans cette activité, nous allons essayer de cartographier tous les composants de votre système en utilisant uniquement le terminal. Nous vérifierons ensuite toutes les informations en utilisant l’interface graphique.
Si vous le souhaitez, vous pouvez éditer un fichier texte sur votre ordinateur pour noter la sortie des lignes de commande ou utiliser un bon vieux stylo et papier.
1 — Quel est votre système d’exploitation ?
La première chose à savoir pour continuer cette activité est quel est votre système d’exploitation. Pour cette première question, nous n’entrerons pas dans les détails, nous avons seulement besoin de connaître la famille de l’OS : Linux, Windows ou MacOS.
2 — Utilisation de la ligne de commande
La deuxième étape consiste à lancer l’application Terminal de votre système d’exploitation. Cette application peut différer d’un OS à un autre (d’où la première question facile) :
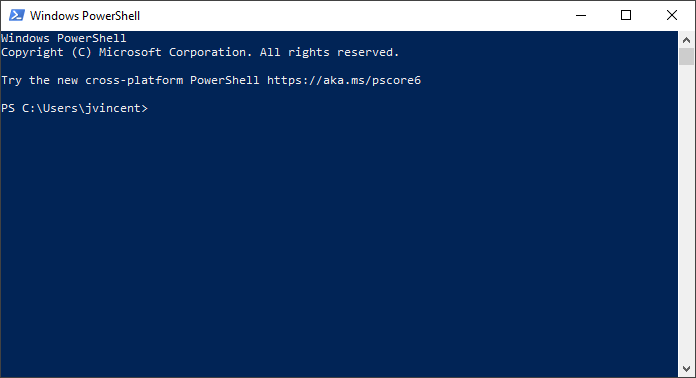
Les versions modernes de Windows disposent de deux applications Terminal que vous pouvez utiliser : l’ancien cmd.exe ou le plus avancé PowerShell.
Le premier, cmd.exe, est plus ancien et plus simple mais peut être considéré comme moins pratique.
PowerShell, en revanche, est plus moderne et assez flexible, mais sa syntaxe orientée objet peut être difficile à comprendre.
Cependant, il est plus similaire à celui de Linux et MacOS car la plupart des commandes de type Unix sont des alias pour les commandes natives de PowerShell.
Pour lancer l’un ou l’autre, cliquez sur l’icône de démarrage et tapez : Command Prompt (ou PowerShell) pour exécuter l’un d’eux. N’hésitez pas à utiliser les deux en même temps.

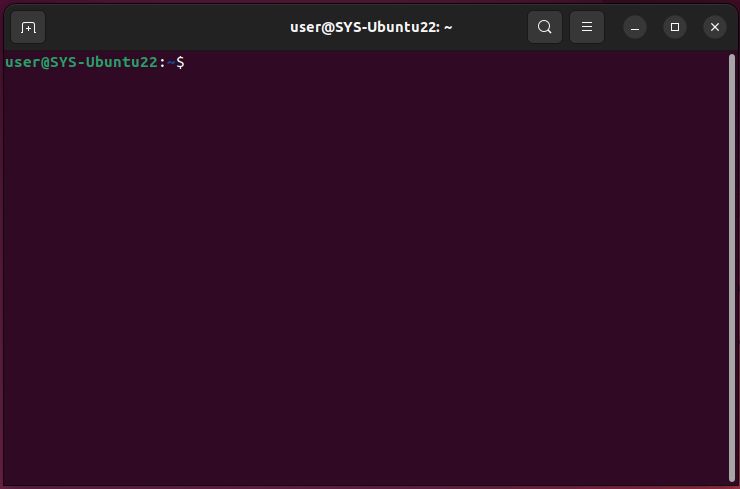
Explorez les menus et cherchez une application appelée “Terminal”, “Shell” ou similaire.
C’est probablement une icône représentant un écran rectangulaire noir et blanc affichant le texte $.
Juste au cas où, quelques indications pour Linux Ubuntu.
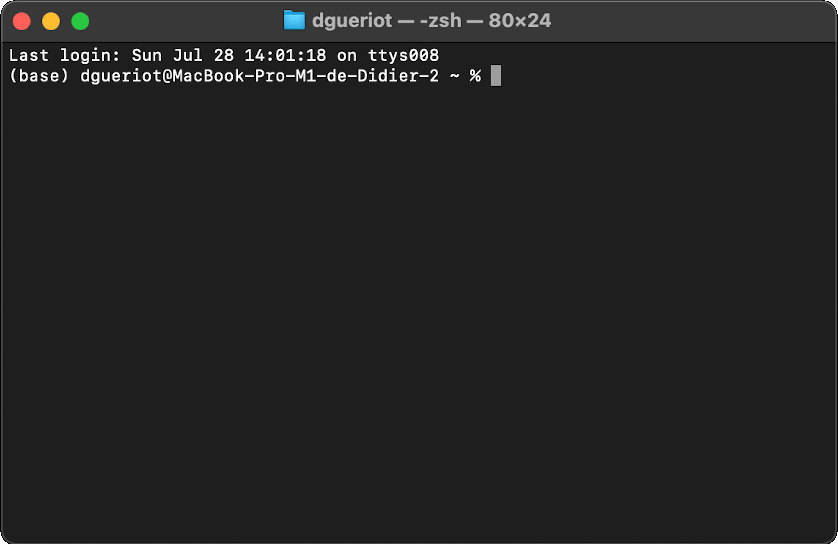
Mettez Finder au premier plan, puis dans la barre de menu, cliquez sur “Aller” et sélectionnez “Utilitaires”.
Un dossier s’ouvrira, faites défiler jusqu’à trouver une application appelée “Terminal”.
C’est probablement une icône représentant un écran rectangulaire noir et blanc affichant le texte %.
Juste au cas où, quelques indications pour MacOS.
3 — Découvrez votre propre ordinateur
Maintenant que vous avez ouvert l’application Terminal de votre OS spécifique, nous allons apprendre un peu sur votre ordinateur.
3.1 — Composants matériels
Dans cet exercice, nous allons essayer d’obtenir la liste des composants matériels les plus importants de votre ordinateur. En particulier, nous allons apprendre sur les composants de l’architecture von Neumann que nous avons introduite pendant le cours.
3.1.1 — CPU
Tout d’abord, déterminons votre CPU :
Information
Sous Windows, lorsque vous utilisez cmd.exe, la commande wmic est actuellement obsolète, et Microsoft encourage l’adoption de l’approche PowerShell.
De plus, vous pouvez utiliser la commande simple systeminfo qui affiche les informations de configuration du système d’exploitation.
Cependant, elle est très verbeuse et ici nous voulons juste les caractéristiques du CPU.
Répondez aux questions suivantes :
-
Quel est le fabricant de votre CPU ?
-
Quelle est la fréquence de votre CPU ?
-
Optionnel – Avez-vous obtenu le nombre de cœurs disponibles (vous devrez peut-être chercher un paramètre supplémentaire) ?
3.1.2 — Mémoire
Jetons un œil à la RAM :
Répondez aux questions suivantes :
-
Quelle quantité de mémoire physique avez-vous sur votre ordinateur ?
-
Quelle est la fréquence de la ou des puces ?
3.1.3 — Stockage
Vérifions vos périphériques de stockage :
Répondez aux questions suivantes :
-
Combien de disques de stockage sont installés sur votre ordinateur ?
-
Quelle est la taille totale de vos disques ?
-
Avez-vous des disques durs (HDD) ou des disques à état solide (SSD) ?
-
Optionnel – Combien de partitions sont présentes, et qu’est-ce qu’une partition ?
3.1.4 — Périphériques
Quels sont les périphériques branchés à votre ordinateur ? Vérifions :
Répondez aux questions suivantes :
-
Quels sont les périphériques USB actuellement connectés à votre ordinateur, s’il y en a ?
-
Pouvez-vous obtenir les informations sur votre carte graphique ?
3.2 — Système d’exploitation
Dans cet exercice, nous allons apprendre les caractéristiques de votre Système d’exploitation que nous avons introduit pendant le cours.
3.2.1 — Version de l’OS
Commençons par obtenir sa version :
Répondez aux questions suivantes :
-
Quelle est la version spécifique de votre système d’exploitation ?
-
Avez-vous réussi à obtenir la version du noyau ?
3.2.2 — Processus et démons
Quels sont les programmes/processus en cours d’exécution sur l’ordinateur :
Répondez aux questions suivantes :
- Reconnaissez-vous des programmes que vous avez lancés ?
- Tous les processus sont-ils listés ?
- Optionnel – Y a-t-il un moyen de rendre la sortie plus lisible (regardez l’aide de la commande
more) ?
3.2.3 — Utilisateurs
Vérifions votre nom d’utilisateur sur l’ordinateur :
3.2.4 — Ressources disponibles
Quelles ressources sont disponibles sur votre ordinateur ? Vérifions d’abord la mémoire (RAM) disponible :
Puis, vérifions l’espace disque disponible :
3.3 — Remarques sur le terminal
La ligne de commande vous permet de faire beaucoup plus de tâches que nous ne couvrirons pas ici. Cependant, vous avez peut-être remarqué que certaines commandes terminal sont plus simples que d’autres selon le système d’exploitation, en particulier celles de Linux. Cela peut s’expliquer par le besoin d’interagir plus souvent avec ces OS via une ligne de commande (pour administrer un serveur par exemple). C’est pourquoi, même si vous n’utilisez pas actuellement une machine Linux, nous vous encourageons vivement à apprendre et pratiquer les commandes Linux pour le cursus informatique de l’IMT Atlantique.
4 — Utilisation de l’interface graphique pour validation
Maintenant que nous avons obtenu une grande partie des informations matérielles et du système d’exploitation en utilisant la CLI, nous allons vérifier toutes ces informations en utilisant l’interface graphique.
4.1 — Les composants matériels
La plupart des OS modernes ont un point d’entrée unique pour obtenir tous les composants matériels de votre PC, y compris son CPU, ses disques, ses périphériques, etc.
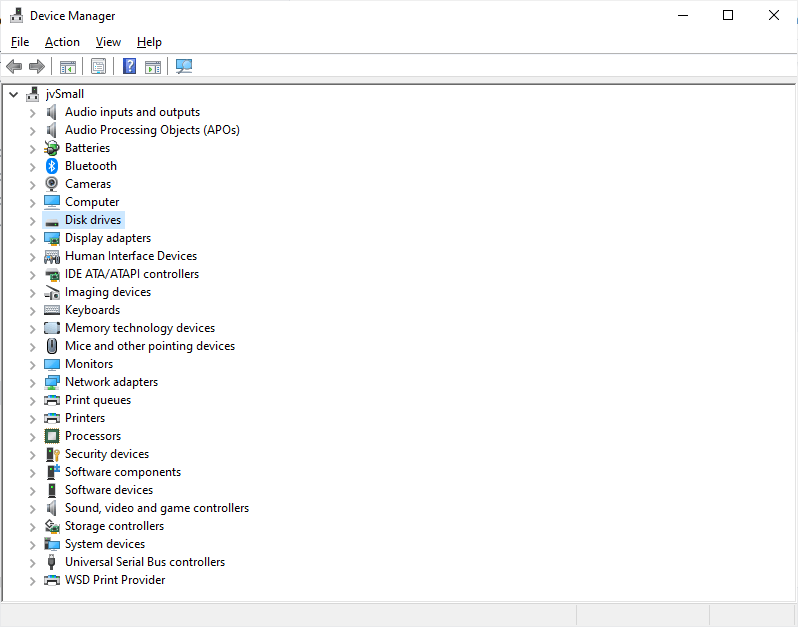
Sous Windows, vous pouvez accéder à ce qu’on appelle le Gestionnaire de périphériques (ou Device Manager) soit en le recherchant dans le menu démarrer, soit avec un joli raccourci en cliquant droit sur l’icône du menu démarrer.
En fait, presque tous les outils d’administration de Windows sont accessibles de cette manière (cela peut aussi vous éviter un clic pour éteindre votre ordinateur).
Contrairement à Windows et MacOS, les distributions Linux ne sont pas toujours livrées avec une interface graphique préinstallée pour afficher les informations matérielles car il est souvent plus rapide d’utiliser la CLI (c’est le cas d’Ubuntu par exemple). Heureusement, vous pouvez toujours installer une telle application vous-même.
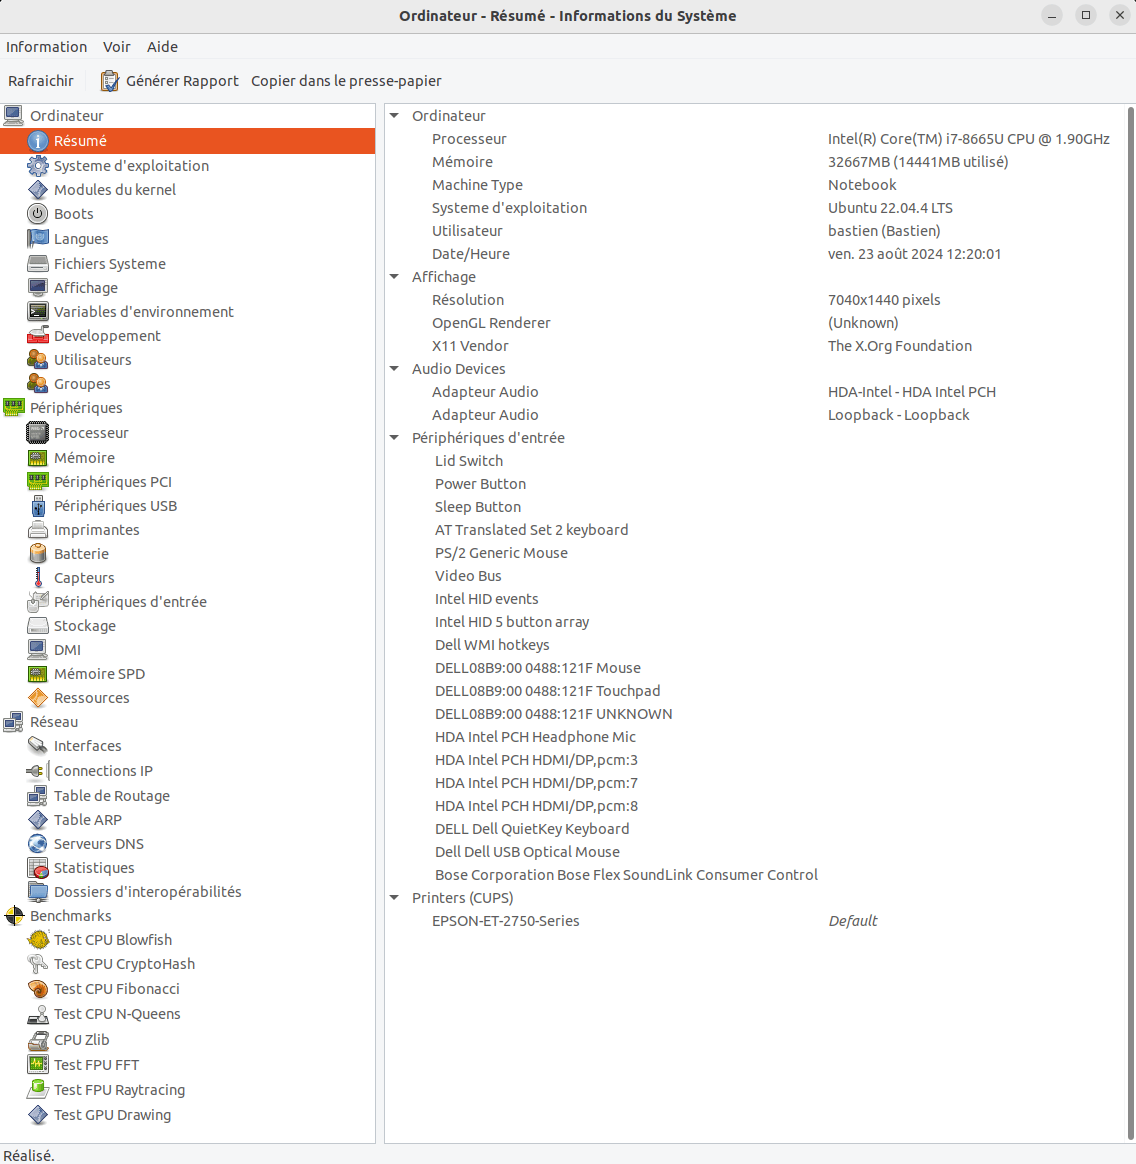
Sur Ubuntu, cette application s’appelle hardinfo et vous pouvez l’installer en utilisant le centre d’applications ou encore mieux en utilisant la ligne de commande.
Décryptons cette ligne de commande :
sudo– exécute une commande en tant qu’un autre utilisateur afin de rendre l’installation possible (généralementroot). C’est pourquoi on vous demande votre mot de passe, sudo vérifie que vous êtes autorisé à exécuter la commande suivante.apt– est une application qui fournit une interface en ligne de commande de haut niveau pour le système de gestion de paquets.install– effectue l’installation d’un ou plusieurs paquets spécifiés après.hardinfo– est le paquet spécifié qui contient l’application.
Si les commandes retournent une erreur, vous avez peut-être saisi un mauvais mot de passe, ou la liste des paquets du système de gestion de paquets est obsolète. Dans ce second cas, tapez :
Voici à quoi cela ressemble :
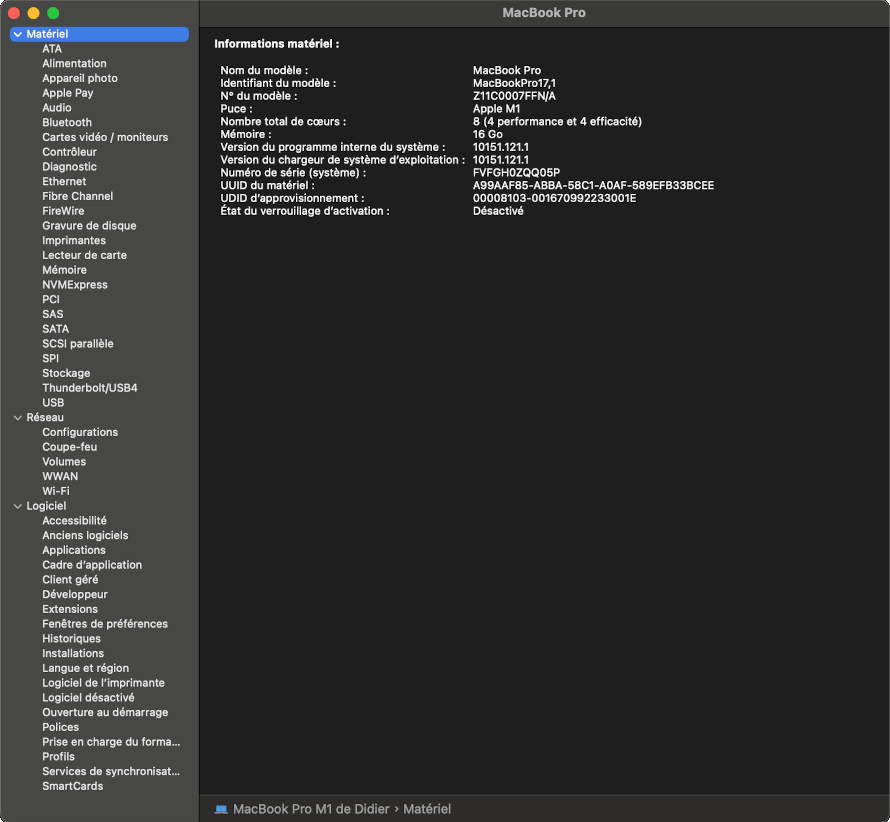
Sur MacOS, l’application graphique s’appelle Informations système (ou System information) vous pouvez la trouver dans le menu des applications ou en maintenant la touche Option enfoncée, puis en choisissant le menu Apple > Informations système.
Si vous souhaitez uniquement afficher les informations sur le disque, vous pouvez aussi accéder à Utilitaire de disque (ou Disk Utility).
Répondez aux questions suivantes :
-
Vérifiez que toutes les informations précédentes que vous avez recueillies sur votre ordinateur sont les mêmes que celles présentées dans l’interface graphique.
-
Optionnel – N’hésitez pas à explorer et découvrir d’autres informations sur votre matériel : vos adaptateurs réseau, carte graphique, etc.
4.2 — Les composants logiciels
Vérifions maintenant les détails de l’OS en utilisant une interface graphique :
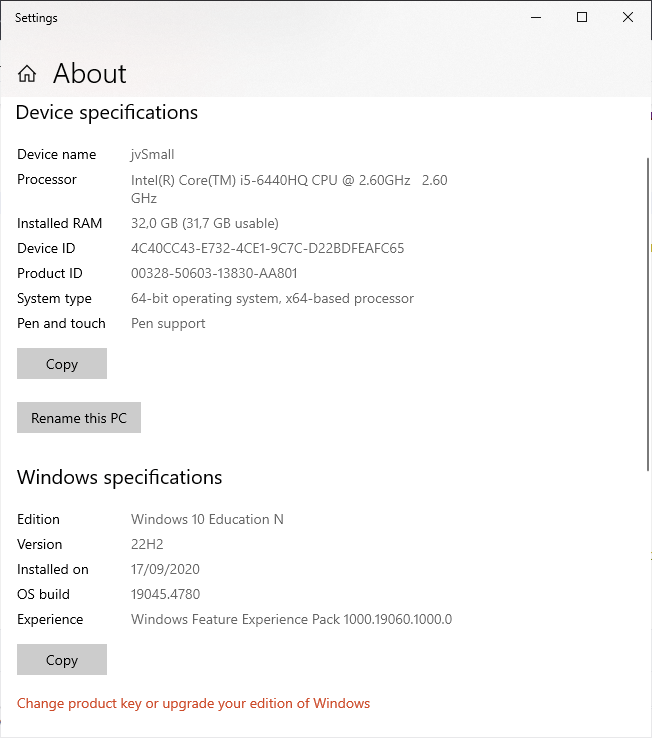
Sous Windows, vous pouvez accéder à la section À propos (ou About) soit en la recherchant dans le menu démarrer, soit en cliquant droit sur l’icône du menu démarrer et en cherchant system.
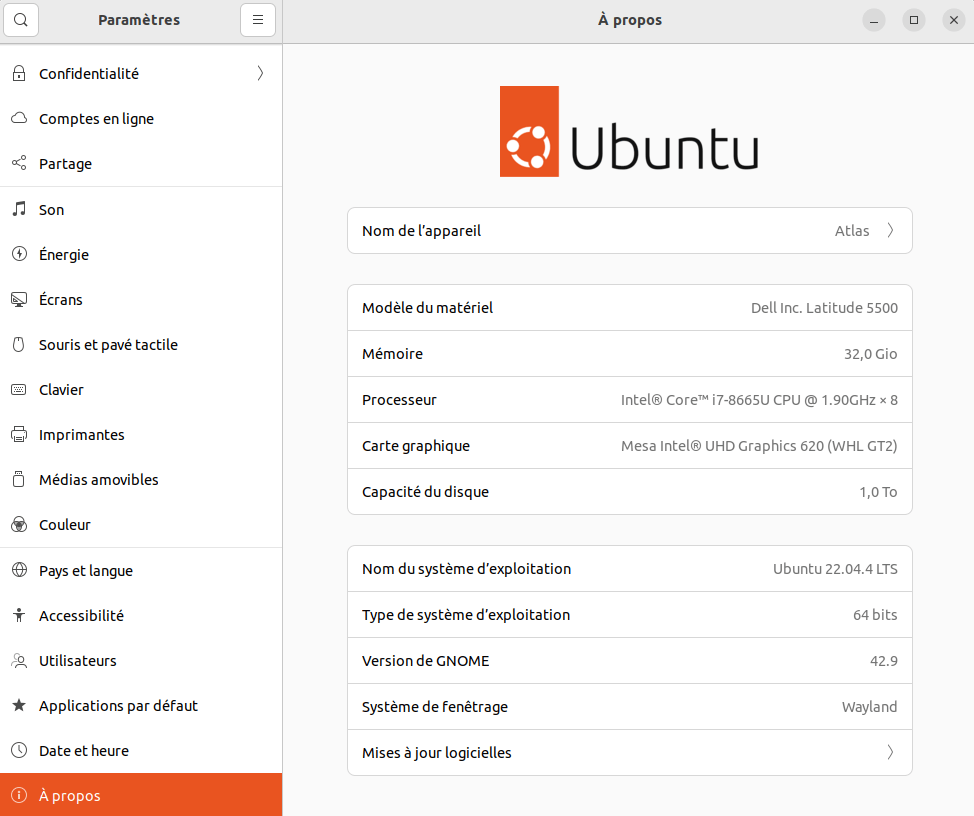
Depuis le menu en haut à droite sur Ubuntu, vous pouvez trouver un panneau paramètres, et en bas de ce panneau vous trouverez l’onglet à propos comme montré ci-dessous.
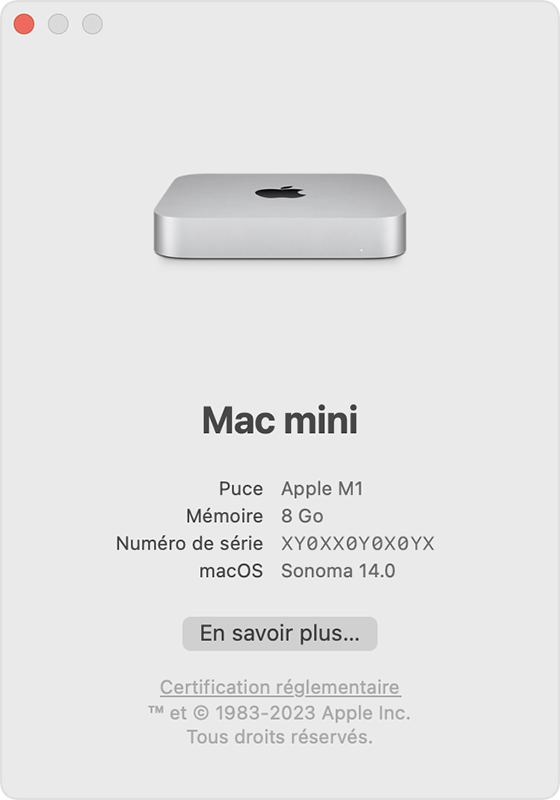
Depuis le menu Apple dans le coin supérieur gauche de l’écran, choisissez À propos de ce Mac.
Vous pouvez aussi vérifier les processus en cours :
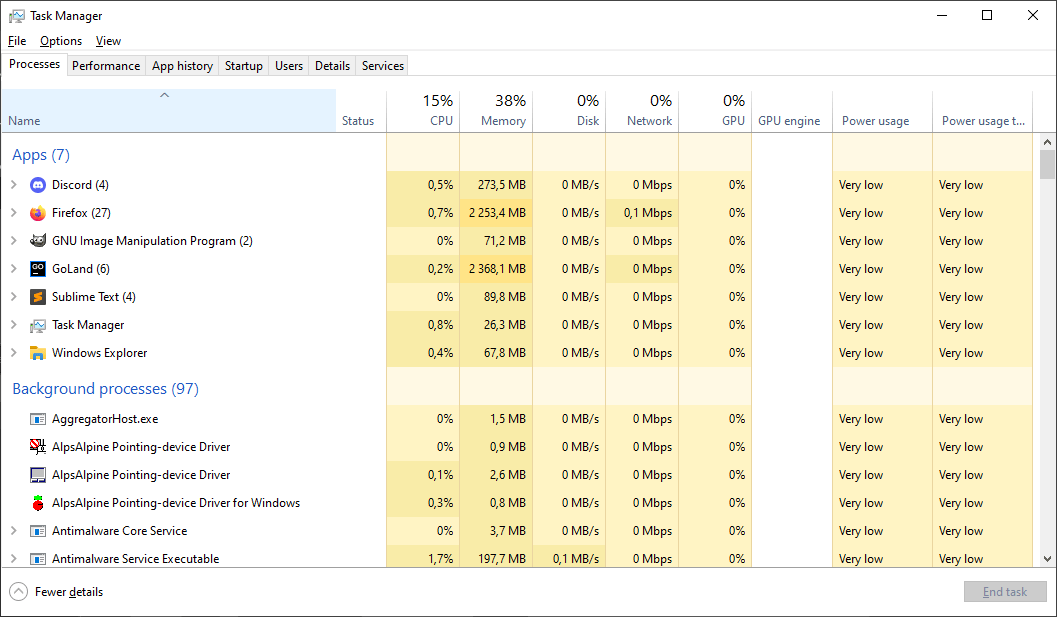
Sous Windows, vous pouvez accéder au Gestionnaire des tâches (ou Task Manager) soit en le recherchant dans le menu démarrer, en cliquant droit sur l’icône du menu démarrer ou avec le raccourci clavier ctrl + shift + esc.
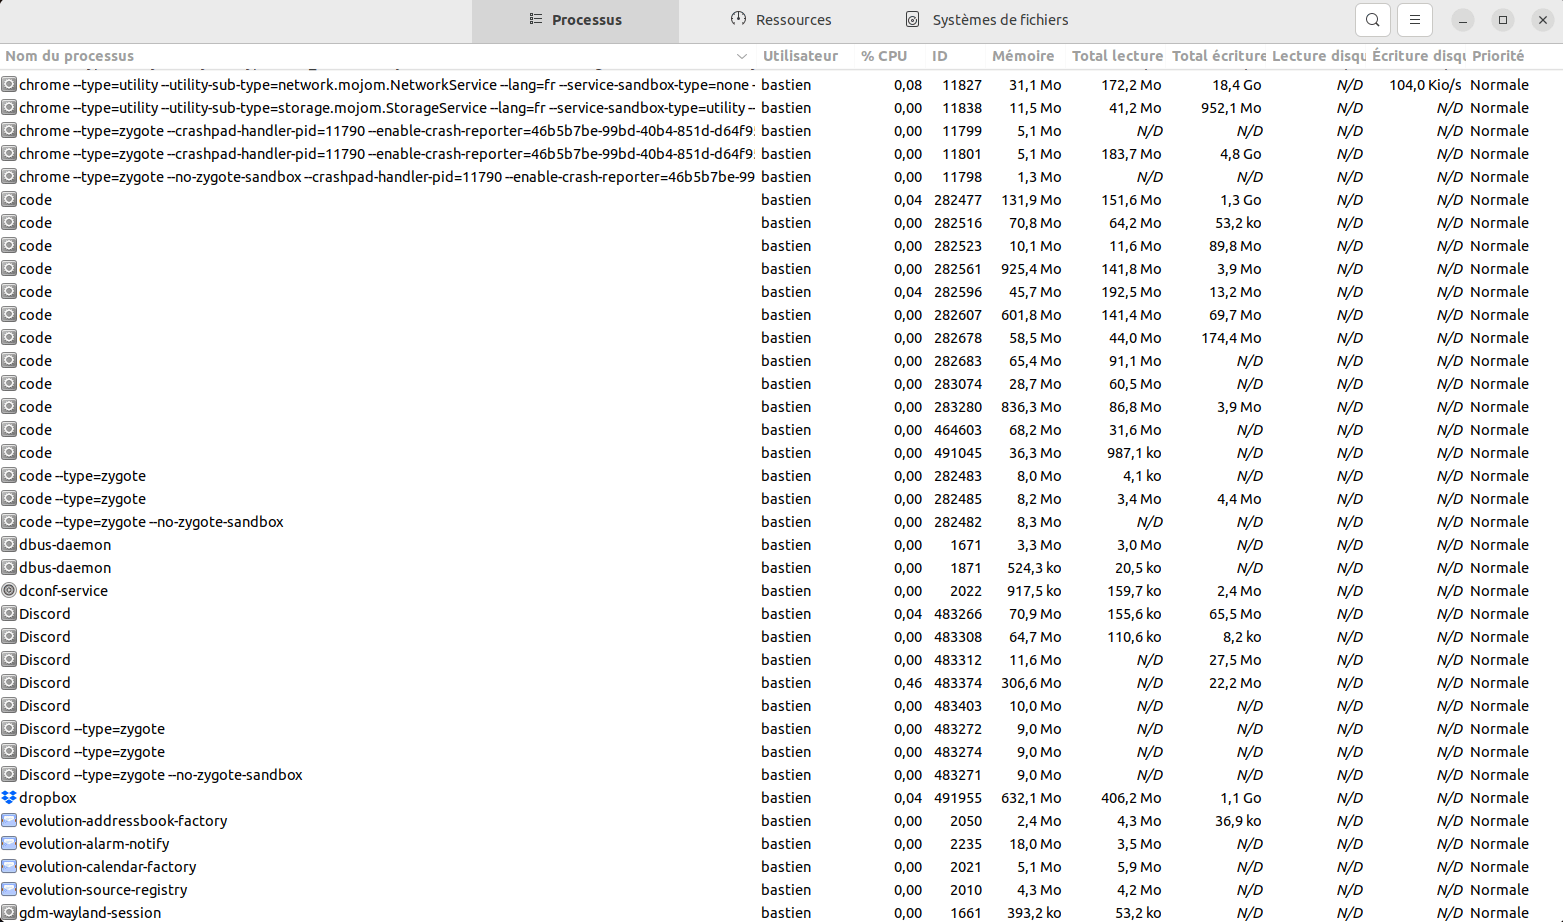
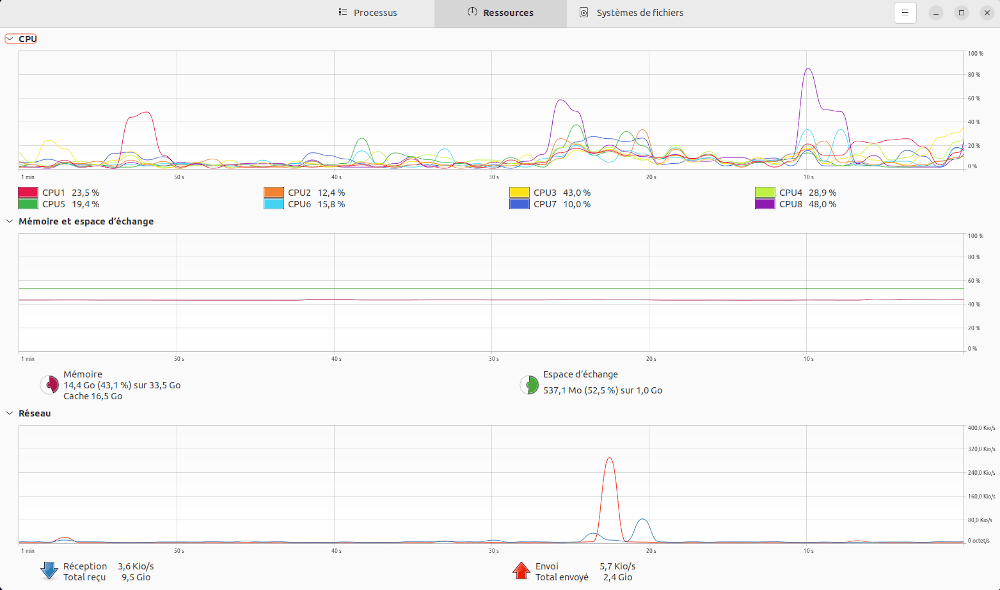
Sous Ubuntu, l’application graphique pour obtenir les processus en cours s’appelle souvent Moniteur système.
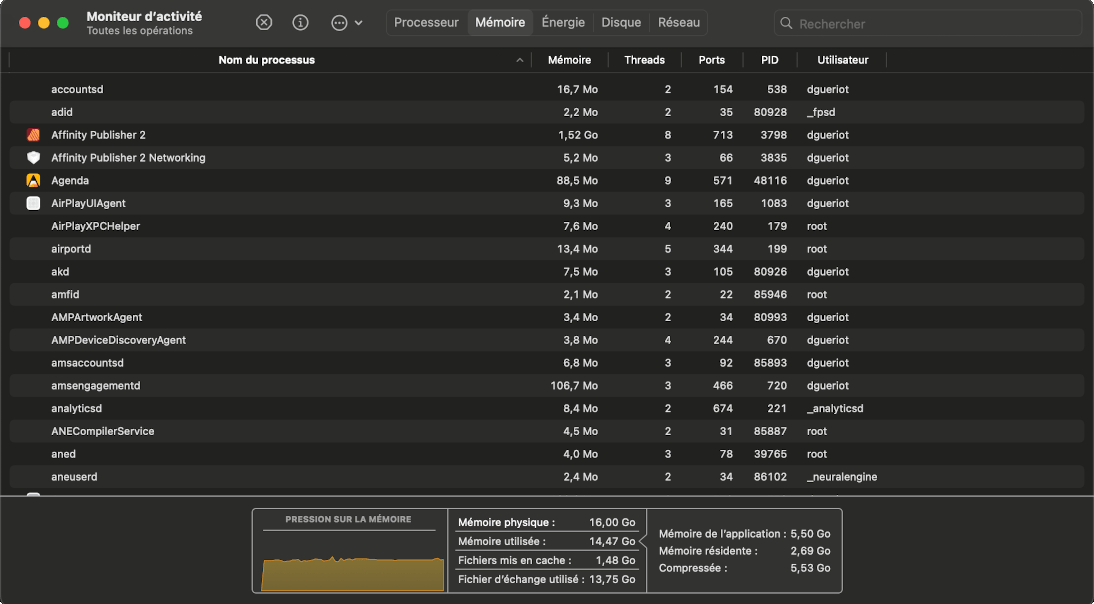
Sur MacOS, l’application graphique s’appelle Moniteur d'activité (ou Activity Monitor) vous pouvez la trouver dans le menu des applications.

Répondez aux questions suivantes :
-
Les processus en cours sont-ils les mêmes que ceux que vous avez trouvés avec la CLI ?
-
Lancez une application simple (comme un éditeur de texte), la voyez-vous dans la liste des processus ?
-
Optionnel – Vous pouvez arrêter un processus depuis cette interface (Attention à sélectionner le bon processus et pas un autre, on utilise généralement cette possibilité lorsqu’un programme ne répond plus).
Maintenant, trouvons les ressources disponibles :
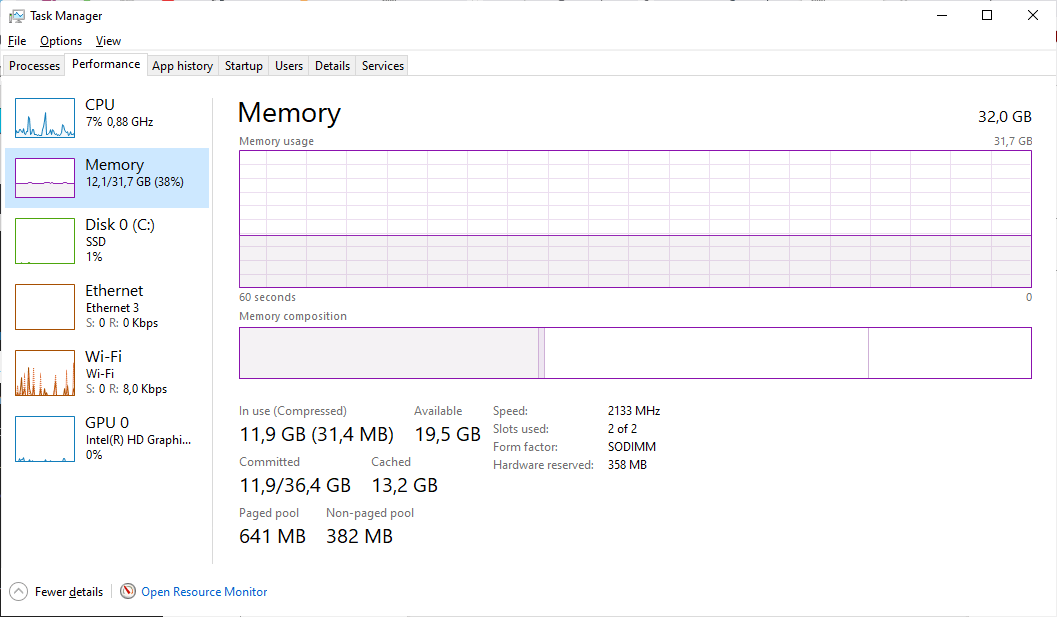
Dans le Gestionnaire des tâches (ou Task Manager), il y a un onglet appelé Performances où vous pouvez trouver l’utilisation du CPU, de la mémoire, du disque et bien plus.
Dans le Moniteur système, sous l’onglet Ressources vous pouvez trouver l’utilisation du CPU, de la mémoire, du disque et bien plus.
Sur MacOS, le Moniteur d'activité (ou Activity Monitor) peut aussi afficher l’utilisation du CPU, de la mémoire et du disque.
5 — Gardez toujours votre système et vos applications à jour
Comme nous l’avons vu, votre ordinateur exécute de nombreux processus différents, que ce soit des applications que vous utilisez ou des services qui effectuent diverses tâches en arrière-plan. Il existe un type spécifique d’applications que nous n’avons pas encore abordé, à savoir les logiciels malveillants.
Les logiciels malveillants, ou malware, sont conçus pour nuire, exploiter ou compromettre autrement un système informatique ou un réseau. Les objectifs principaux des malwares incluent le vol d’informations sensibles (ex. mots de passe, données financières), la perturbation des opérations (ex. provoquer des plantages système, supprimer des fichiers), l’accès non autorisé aux systèmes, et l’utilisation d’appareils compromis pour des activités illégales (ex. envoyer du spam, lancer des attaques sur d’autres systèmes).
Ils peuvent provenir de diverses sources : applications téléchargées depuis des sources non fiables (pensez aux jeux piratés), un lien frauduleux, ou une macro dans un document Word reçu par mail par exemple. Voici une liste de bonnes pratiques de sécurité que vous devriez suivre afin de garder votre ordinateur relativement sûr (malheureusement, il ne peut jamais être sécurisé à 100%).
Important
Voici quelques remarques importantes pour conclure :
-
Vous devez toujours garder votre système à jour et surtout installer tous les correctifs de sécurité automatiquement. De nos jours, avec la démocratisation des SSD, un système peut installer ses mises à jour et redémarrer en quelques minutes voire secondes.
-
Téléchargez toujours les applications depuis des sources fiables (le site officiel ou le gestionnaire de paquets de votre OS préféré).
-
Mettez toujours à jour ces applications ou au moins installez leurs correctifs de sécurité.
-
Soyez toujours prudent avant de cliquer sur un lien ou d’ouvrir un document. Désactivez l’exécution des macros/javascript par défaut dans les traitements de texte ou les lecteurs PDF.
-
Surveillez votre système (utilisez la ligne de commande ou l’interface graphique pour rechercher des processus inconnus et consulter les fichiers journaux).
-
Sauvegardez votre travail (sur une clé USB ou dans le cloud). Vous allez perdre vos fichiers, soit en les supprimant par erreur, en étant victime d’un ransomware, ou simplement parce que votre disque dur ou d’autres parties de votre ordinateur tombent en panne. La question n’est pas si, mais quand !
Pour aller plus loin
6 — Utiliser Linux avec Windows
Comme mentionné ci-dessus, vous aurez probablement besoin d’utiliser Linux à un moment donné durant votre cursus à l’IMT Atlantique, il peut donc être utile d’apprendre les commandes de base dès que possible. Pendant longtemps, cela signifiait devoir installer complètement une distribution Linux sur votre ordinateur en remplaçant Windows ou en l’installant en dual boot. Vous deviez alors redémarrer votre ordinateur pour choisir entre les deux OS, ce qui signifiait que vous ne pouviez pas les faire tourner en même temps.
Cependant, depuis 2016, il est possible d’exécuter un environnement Linux sur Windows en utilisant Windows Subsystem for Linux (WSL). Bien que limité au début, il utilise maintenant un vrai Kernel Linux, et il peut même exécuter des applications GUI Linux dans les versions plus récentes.
Nous vous encourageons fortement donc à l’installer et à l’utiliser. Vous pouvez trouver toute la procédure d’installation sur le site officiel de Microsoft.
Information
Voici quelques points qui peuvent vous arriver lors de l’installation :
-
Vous pouvez obtenir une erreur Please enable the Virtual Machine Platform Windows feature and ensure virtualization is enabled in the BIOS. Si c’est le cas, regardez cette vidéo pour une solution !
-
Lors de l’installation de Linux, il vous sera demandé de créer un utilisateur. Ce sera votre identité lorsque vous interagirez avec le système Linux. Sur Linux, les noms d’utilisateur doivent être en minuscules, sans espaces ni caractères spéciaux.
Lorsque WSL et le système Linux sont installés, vous aurez accès à un prompt commençant par #.
Cela correspond à un prompt root (administrateur).
À ce stade, vous pouvez déjà utiliser votre système Linux en tapant des commandes. Cependant, vous pouvez vouloir une interface graphique, qui est plus conviviale qu’un terminal. Pour cela, vous pouvez suivre ce tutoriel.
Pour aller encore plus loin
Si vous souhaitez améliorer vos compétences en ligne de commande et impressionner vos camarades en ne touchant plus jamais à une souris, vous pouvez suivre les liens ci-dessous.
-
Cours complet sur les commandes shell.
-
Apprenez à écrire des scripts Shell pour automatiser vos tâches.